Showing posts with label vintaged. Show all posts

Friday, September 30, 2011

Week 5 {Self-Decorated Bulletin Board}

I know, I know.
Its been like 700 weeks since my last post. 
Not literally, but still, its been a while.
But, its been busy. 
And its been fun.
And I'm here to tell ya that I've got another tutorial for you.
Its called the Self-Decorated Bulletin Board.
And, to be honest, its one of my favorites.
So, be prepared to have your socks knocked off your feet!


Materials:

- A Bulletin Board (the size doesn't really matter,
just make sure you have enough paper to cover it!)
- Scrapbook paper (cute, coordinating paper is always best ;)
- Mod Podge

Optional:

- Sanding Paper
- Paint 
*Ignore the fabric and buttons I have on there....


Step 1.
If you are going to paint the edge of your bulletin board,
you may want to consider sanding it.
It gives it a more "vintaged" feel.
Which we love, of course.
What I did with mine was to find certain points
That I wanted to create imperfections...
and sanded them.
I made little divets in the wood until
I got it looking how I liked it.


Step 2.  Pant the frame.
In order to get a more personalized look and color, try mixing
paint to create your own color.
This color is a mix of dark brown, red, and light brown.
(paint after wiping off the dust from sanding of course)


 Step 3. Lay out your papers and then mod podge.
There really is no right or wrong way to do this,
but there are a few tips.
When you're laying them out, I suggest making them fit
around the bulletin board, so you don't have to cut any
hanging edges.
This meands tucking papers under if you must.
Once you have your papers all laid out, start mod-podging!
Start with one paper at a time, and try applying mod podge directly to the paper.
If that doesn't work, then add it to the board itself instead.


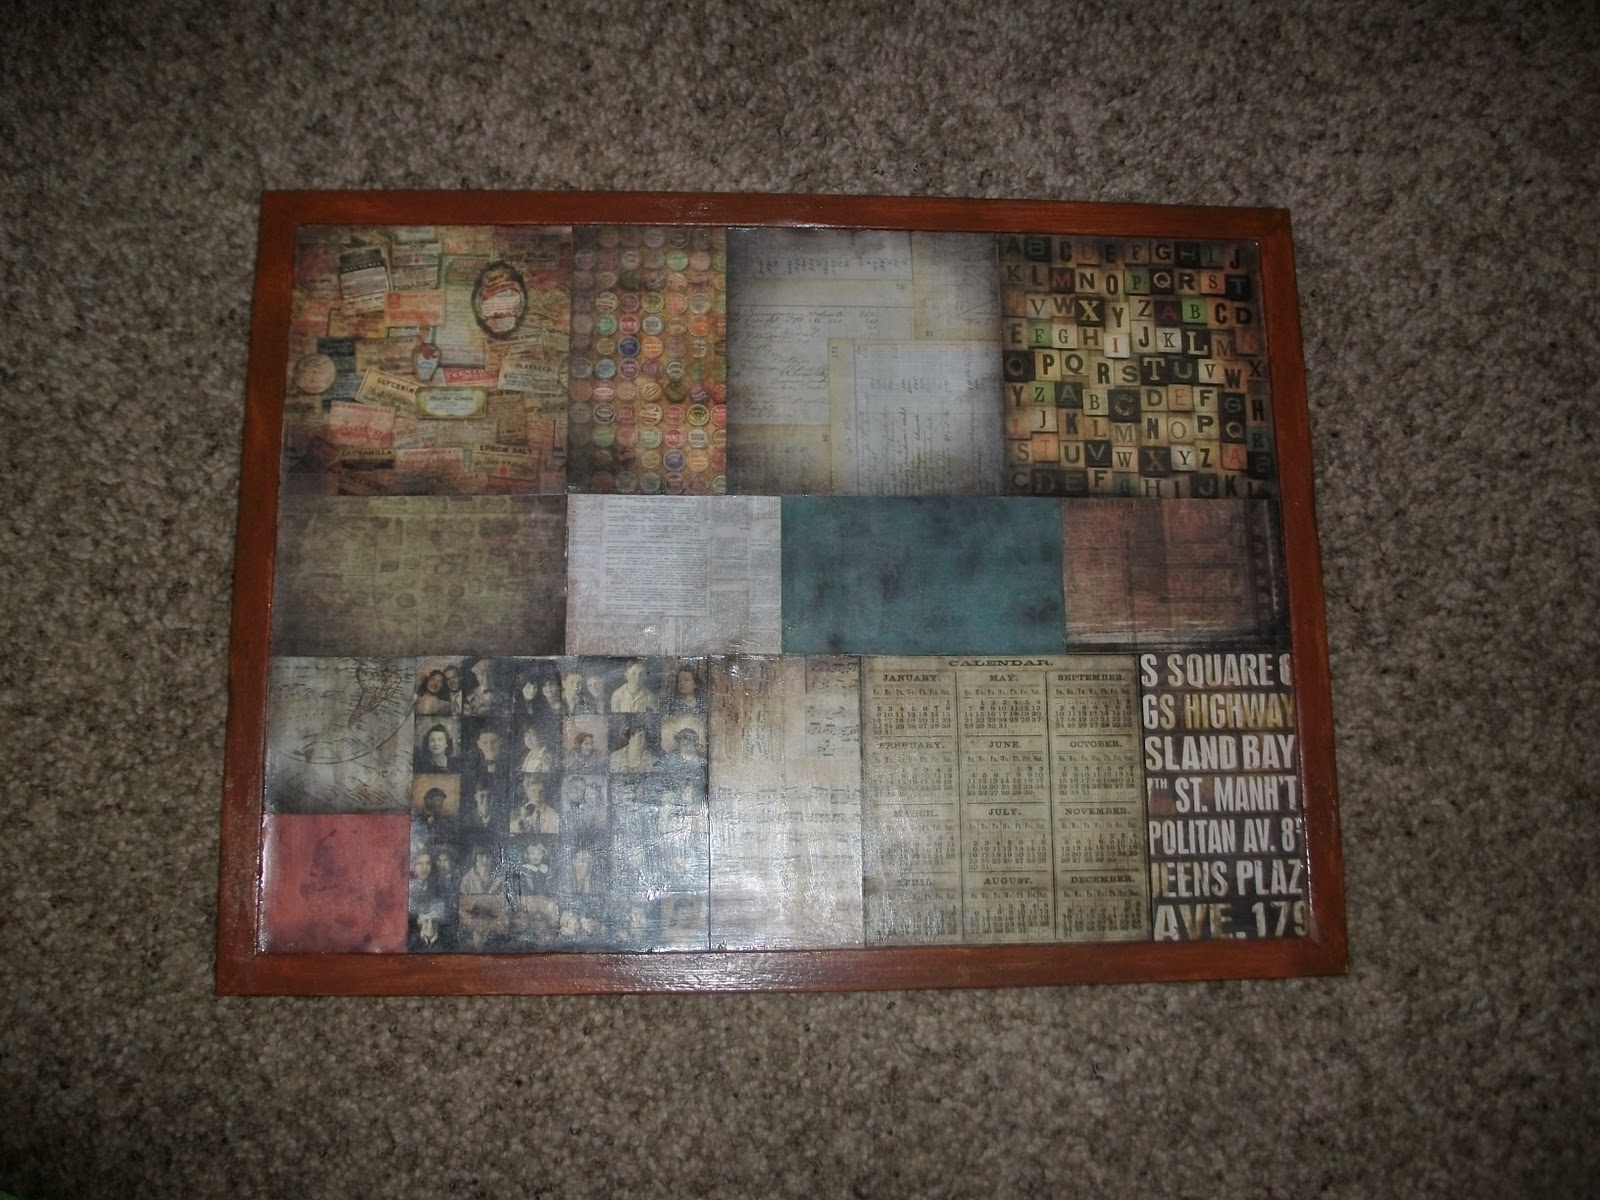
Step 4. Let dry and enjoy!
Bulletin boards are especially fun for hanging notes, pictures, etc. on..
Personalize it as you wish, and most importantly.......
Have fun with your ridiculously easy self- decorated
bulletin board!


Friday, July 1, 2011

Week 3 {Paper flowers with inked edges}

Okay, so I'm a little behind.  But that's okay, because I promise to do better.

Here's the tutorial for week 3:

Materials:
Buttons
(patterned or not) paper
Ink pad
Hot glue gun


For the flowers, I have a tutorial on how to make torn paper flowers.  Go to my blog, and click on 'older posts' a few times, you should see it pop up.

Now for the inking part.  Make sure to roll up  your sleeves because you will probably get ink on you.
Cut out your individual circles, and ink them one by one. You can either use a sponge dipped in an ink pad, or rub the circles on the ink pad by themselves. 


Tips:
There is no certain method to doing this, just keep going until it looks right.
Try not to go too crazy with it -- a little ink on the edges seems to work just great.
When you get to this point, DO NOT PUT YOUR FLOWER TOGETHER.  The ink will rub off and get all over your fingers.
I recommend letting them dry overnight, and in the morning, assemble your flower to your hearts content.
Enjoy!


*I did not take these pictures -- they were taken from blogs on the web.

Monday, June 6, 2011

Week 1 {Binder Page Cover Tutorial}

Hey Y'all!
I'm back.  Like I promised.  It's Week 1 and I'm doing good.
Week one is the binder page cover tutorial.  I recently made one for a church calling, but you can make one for other things such as school, and just to organize.

Here are the supplies that you will be needing:
  1. A binder with a clear covering (so that you can see the page when you slip it in)
  2. Some scrapbook paper of your choice (preferably to match whatever you are making it for)
  3. A flower for embellishment (Stay tuned for a tutorial later on how to make inked flowers)
Now... Lets get started!
The first thing that you need to do is layer your scrapbook paper according to your liking.  Make sure that you measure how big your binder is so that the page cover can easily slip into it, but is not  too small.


Once you have your paper cut, you need to lay it out so it looks good.

Lay it out something like this so it creates a look of symmetry.


After that, glue it together (I would recommend using a glue stick and stacking books on it as it dries or rubber cement), and stand back to admire your work!


Come back next week and I promise I will have tutorial number two ready -- so get out your flowers and be ready to dry them!

Monday, February 21, 2011

Torn Flower Tutorial

Time for another tutorial!  This one comes from another crafting website called littlebirdiesecrets.com.


1. Select a piece of your favorite paper.  (It can be plain or patterned, it doesn't really matter)


2. Draw three or four circles on your piece of paper, all different sizes, ranging from large to small, etc.  Make sure that you draw your circles on the OPPOSITE side of paper that you want showing, that way you don't have to worry about pencil marks.

3. Rip out around the edges of your drawn circles, and crumple them up.  You can spray a bit of water on them if you want to get them to crumple more.


4. Layer layers from largest to smallest, and hot glue together, adding a button of your choice!

5.  If desired, add ink to the edges to give it a more "vintage" look.

6.  Enjoy your flowers!  Make sure that you make enough of them to go around!